   _____ _                 _ _           _
  / ____| |               | | |         | |
 | |    | | ___  _   _  __| | |     __ _| |__
 | |    | |/ _ \| | | |/ _` | |    / _` | '_ \
 | |____| | (_) | |_| | (_| | |___| (_| | |_) |
  \_____|_|\___/ \__,_|\__,_|______\__,_|_.__/
Turn any computer into a remote development environment with Jupyter Lab, VS Code Server, SSH Terminal, Web Dashboard, and Cloudflare Tunnels
git clone https://github.com/Sakib-Dalal/cloudlab.git && cd cloudlab && ./build.sh
Everything you need for remote development in one powerful CLI tool
Full Python notebook environment for data science and development
Browser-based code editor with full extension support
Web-based terminal access via ttyd - no SSH client needed
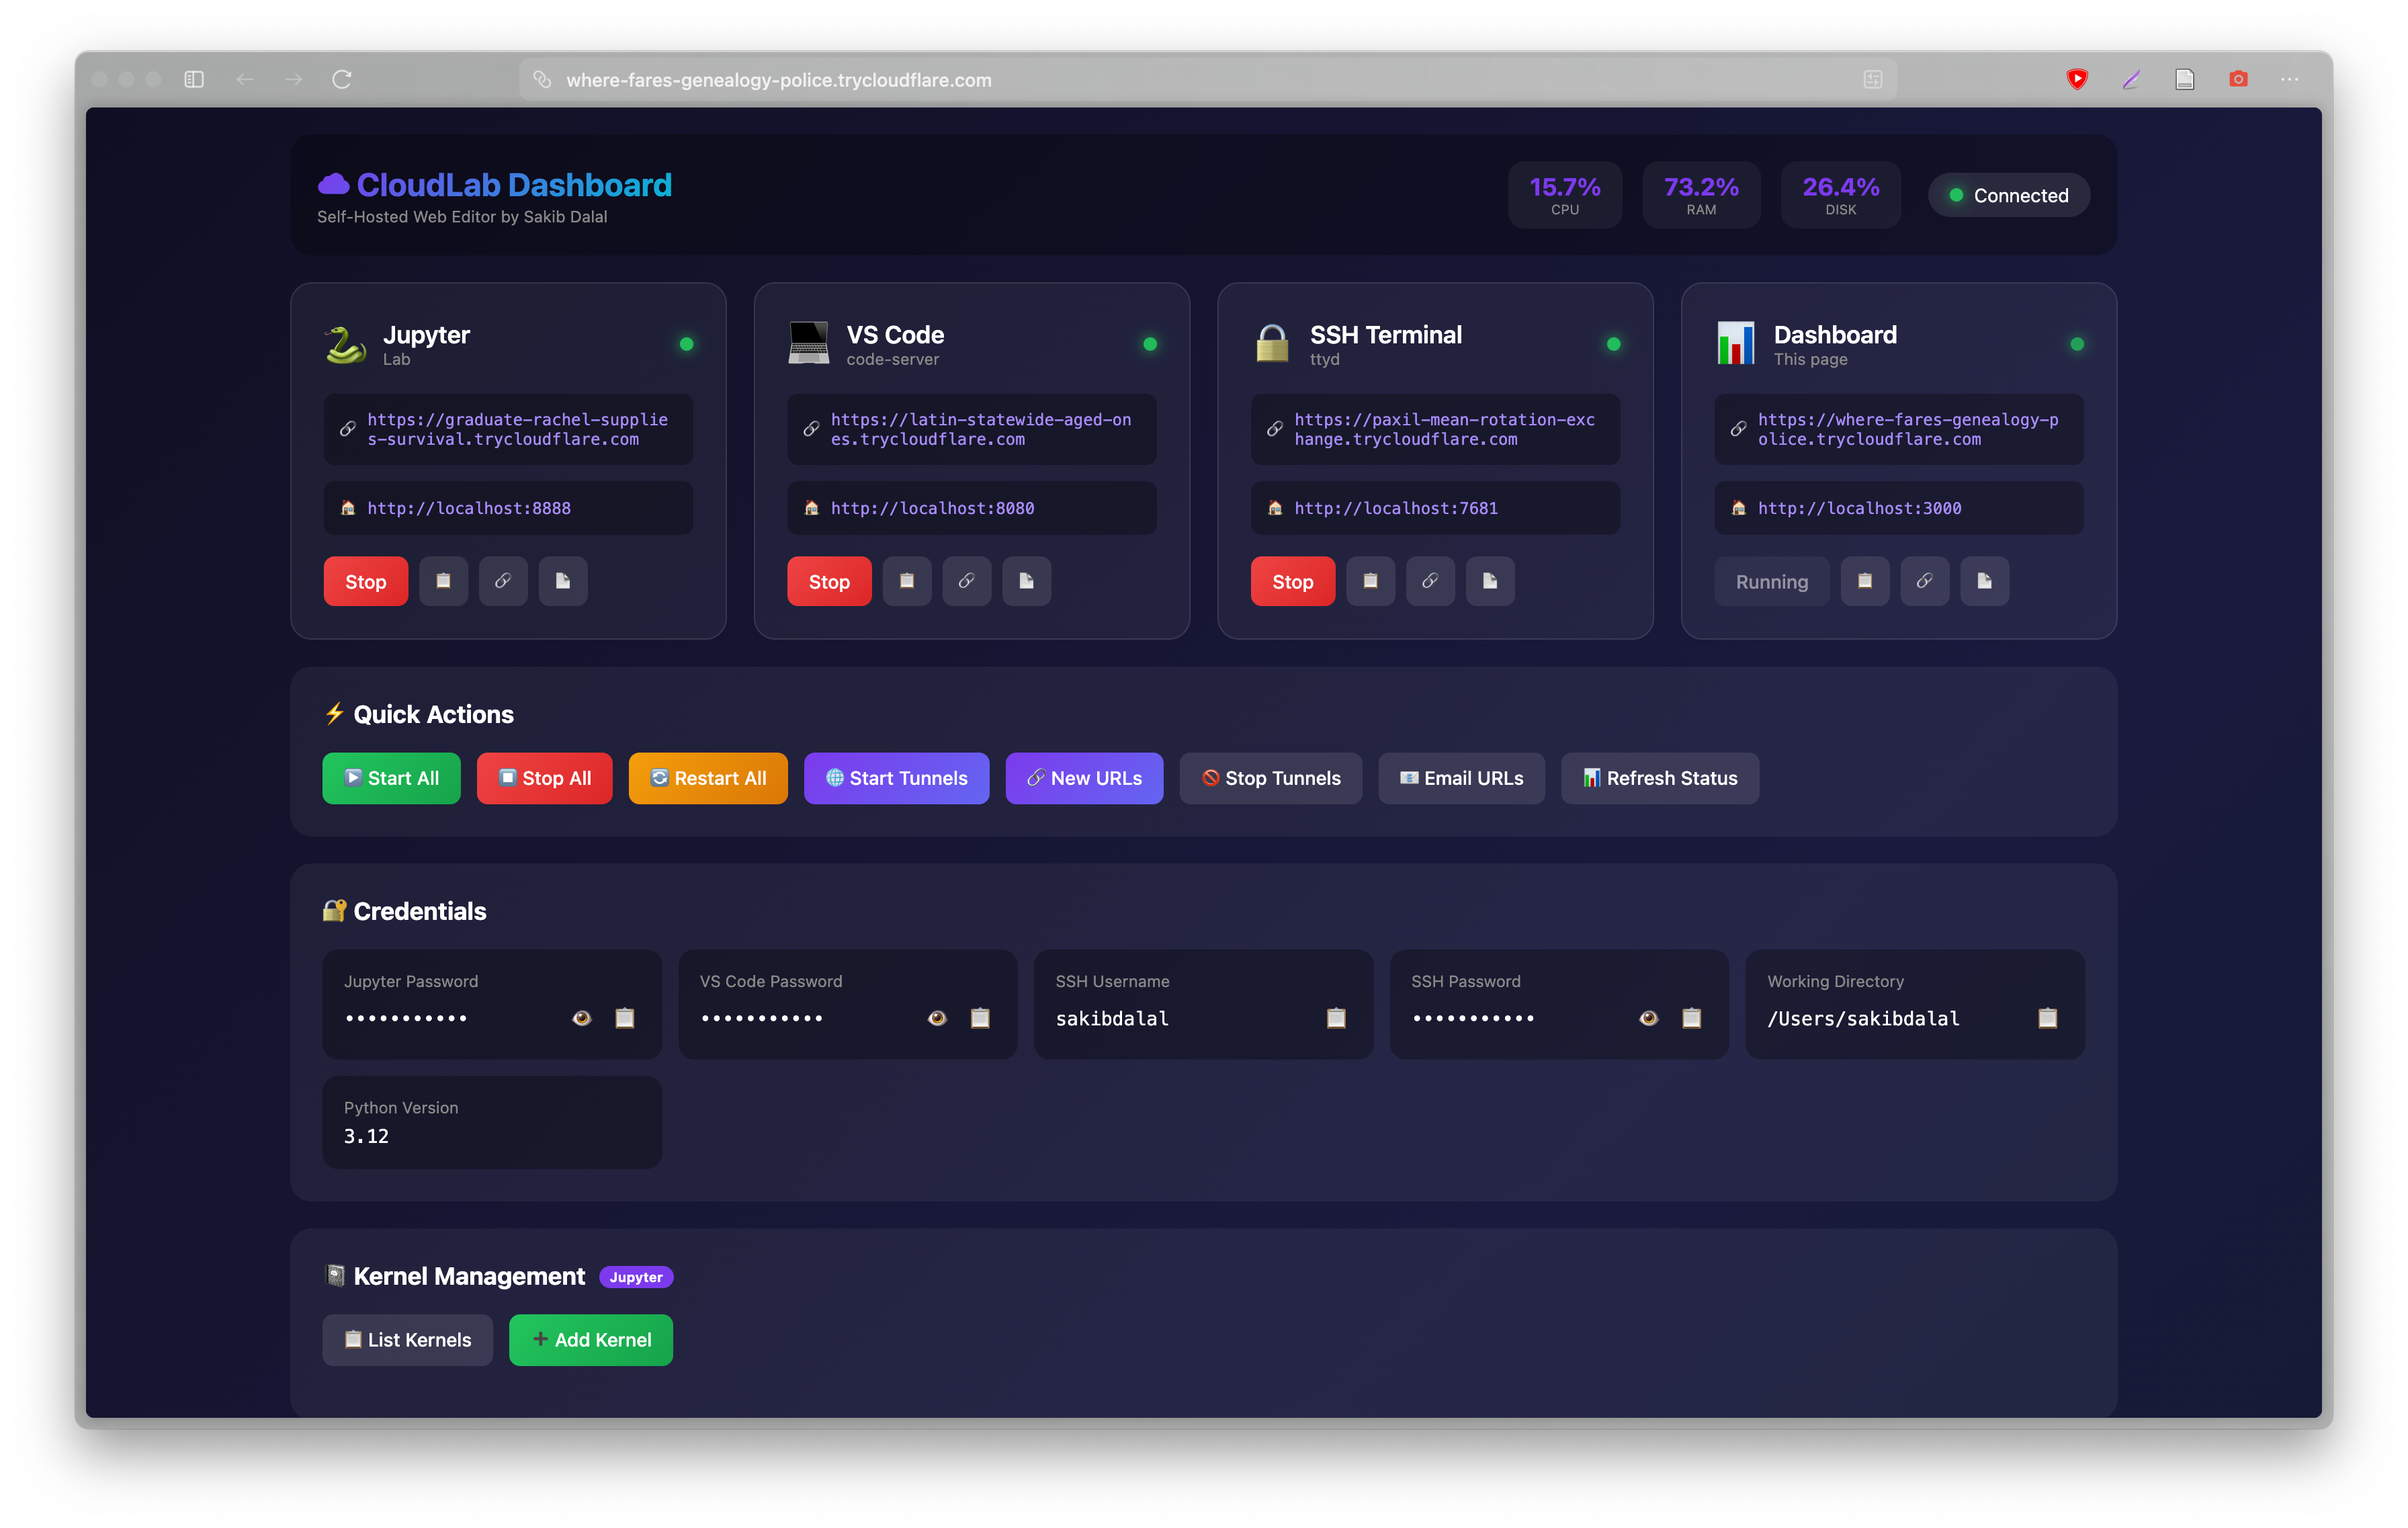
Manage all services, view URLs, and control everything from browser
Free public URLs - no Cloudflare account required!
Receive all tunnel URLs automatically via email
Add/remove Jupyter kernels with different Python versions
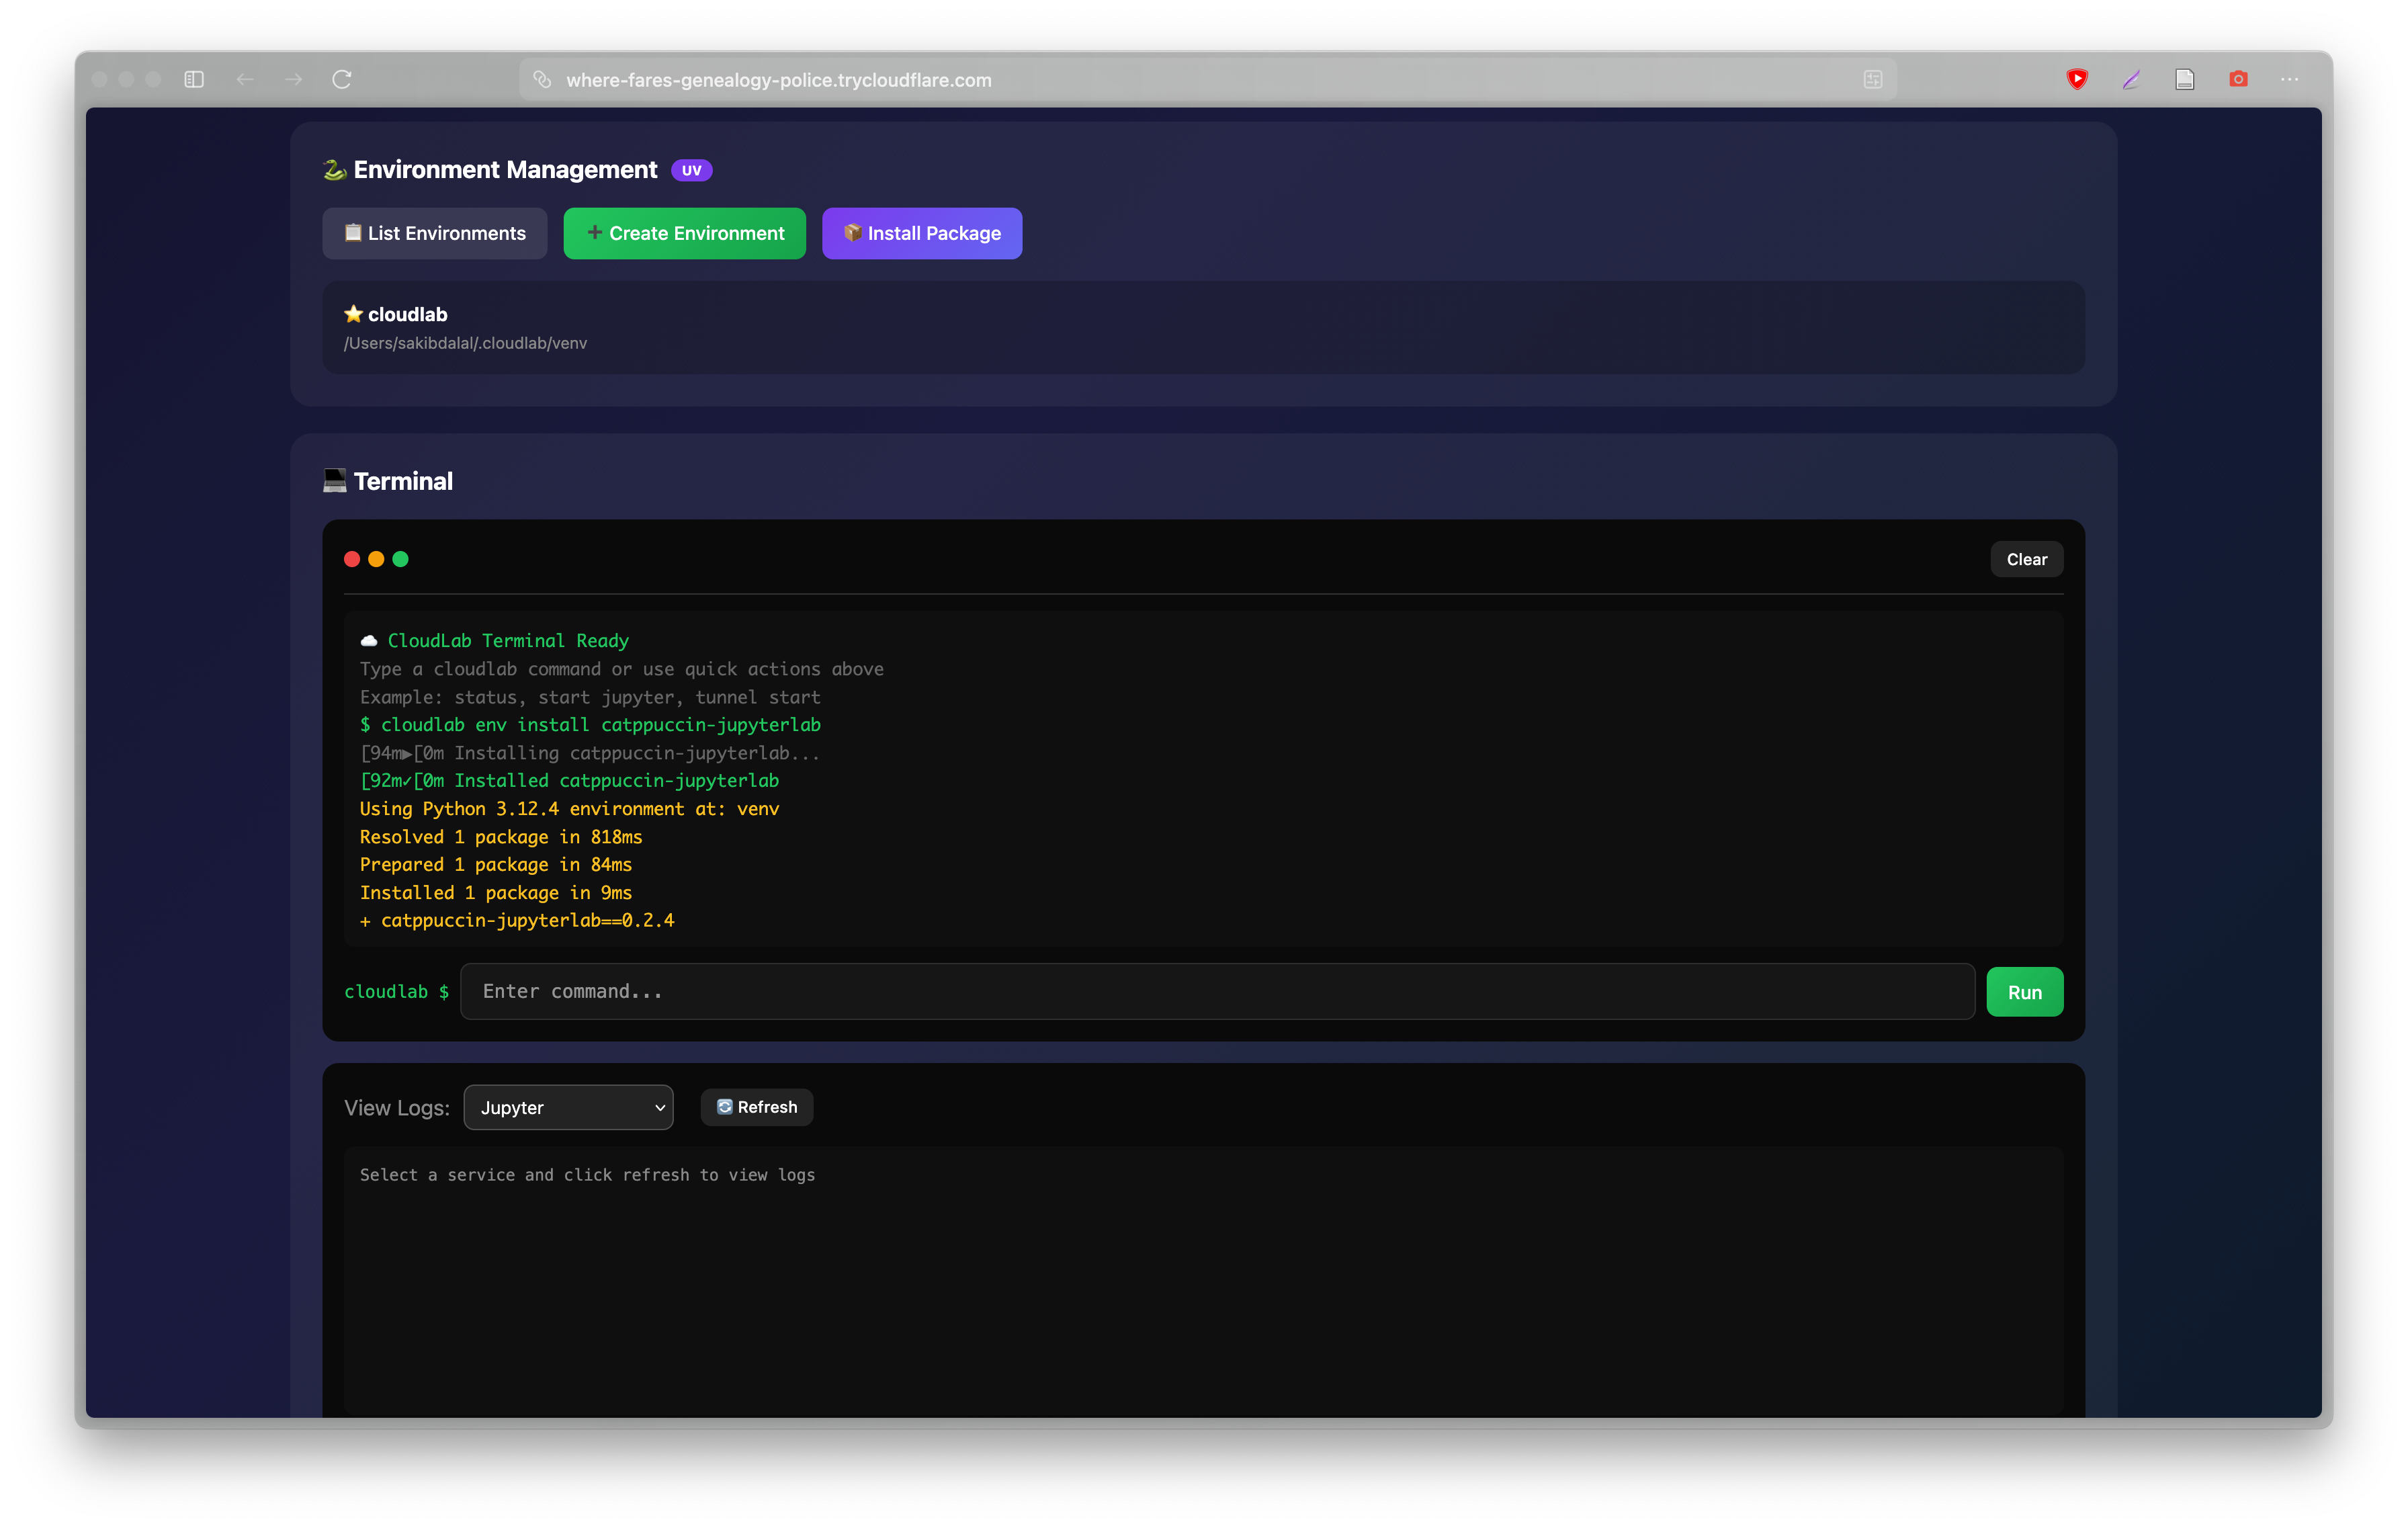
Create and manage Python virtual environments easily
GPU acceleration for Apple Silicon and NVIDIA cards
Major update with Web Dashboard
Manage everything from your browser! No more command line needed for basic operations.
# Start the dashboard
cloudlab start dashboard

# Access at http://localhost:3000

# Or start everything including dashboard
cloudlab start allBrowser-based terminal via ttyd with Cloudflare tunnel support
All 4 service URLs now included in email notifications
Manage everything from your browser at http://localhost:3000
Port 8888
https://xyz.trycloudflare.com
Port 8080
https://abc.trycloudflare.com
Port 7681
https://def.trycloudflare.com
Port 3000
https://ghi.trycloudflare.com
Start, stop, and restart any service with a single click
Copy tunnel URLs to clipboard instantly
See all passwords and access credentials
| Command | Description |
|---|---|
cloudlab start dashboard | Start web dashboard |
cloudlab stop dashboard | Stop dashboard |
cloudlab dashboard start | Start dashboard (alternative) |
cloudlab dashboard stop | Stop dashboard (alternative) |
cloudlab dashboard status | Show dashboard status |
cloudlab logs dashboard | View dashboard logs |
Install Go on your system before getting started
brew install go
sudo rm -rf /usr/local/go
wget https://go.dev/dl/go1.21.5.linux-amd64.tar.gz
sudo tar -C /usr/local -xzf go1.21.5.linux-amd64.tar.gz
echo 'export PATH=$PATH:/usr/local/go/bin' >> ~/.bashrc
source ~/.bashrc
winget install GoLang.Go
Get up and running in minutes
git clone https://github.com/Sakib-Dalal/cloudlab.git
cd cloudlabchmod +x build.sh
./build.shcloudlab init
cloudlab install all
cloudlab start all
This starts Jupyter, VS Code, SSH Terminal, Dashboard, and all tunnels!
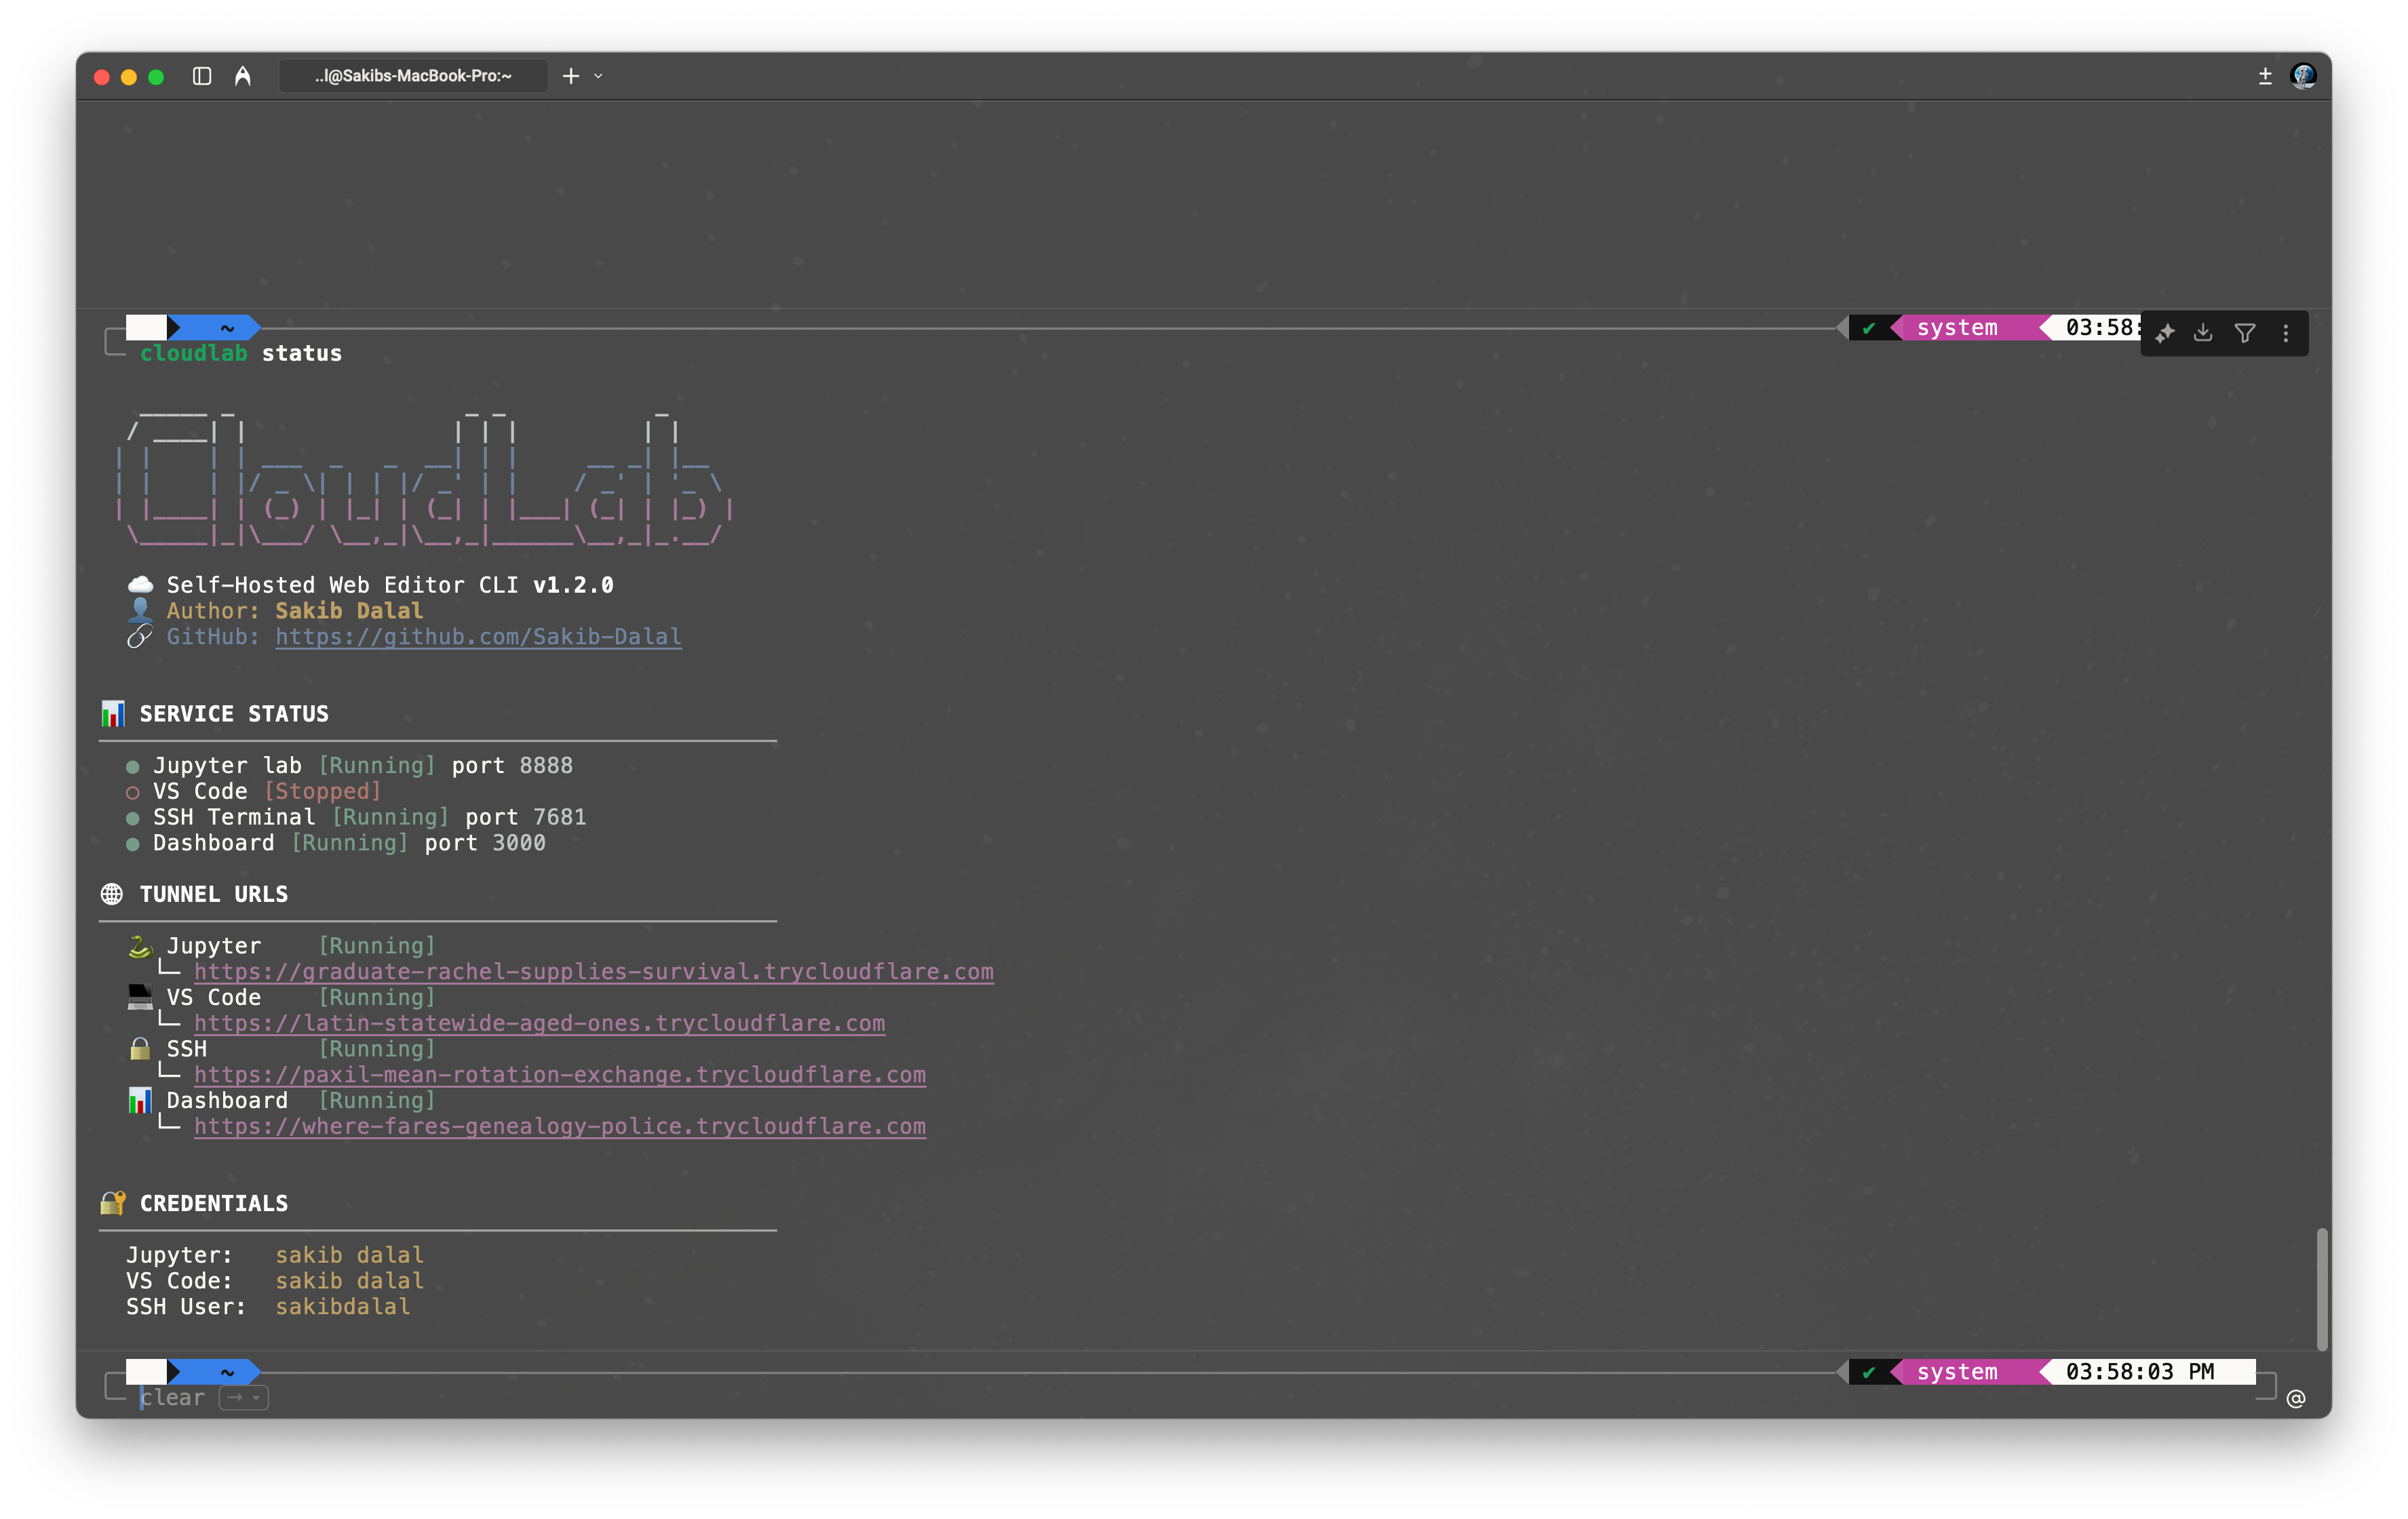
cloudlab status
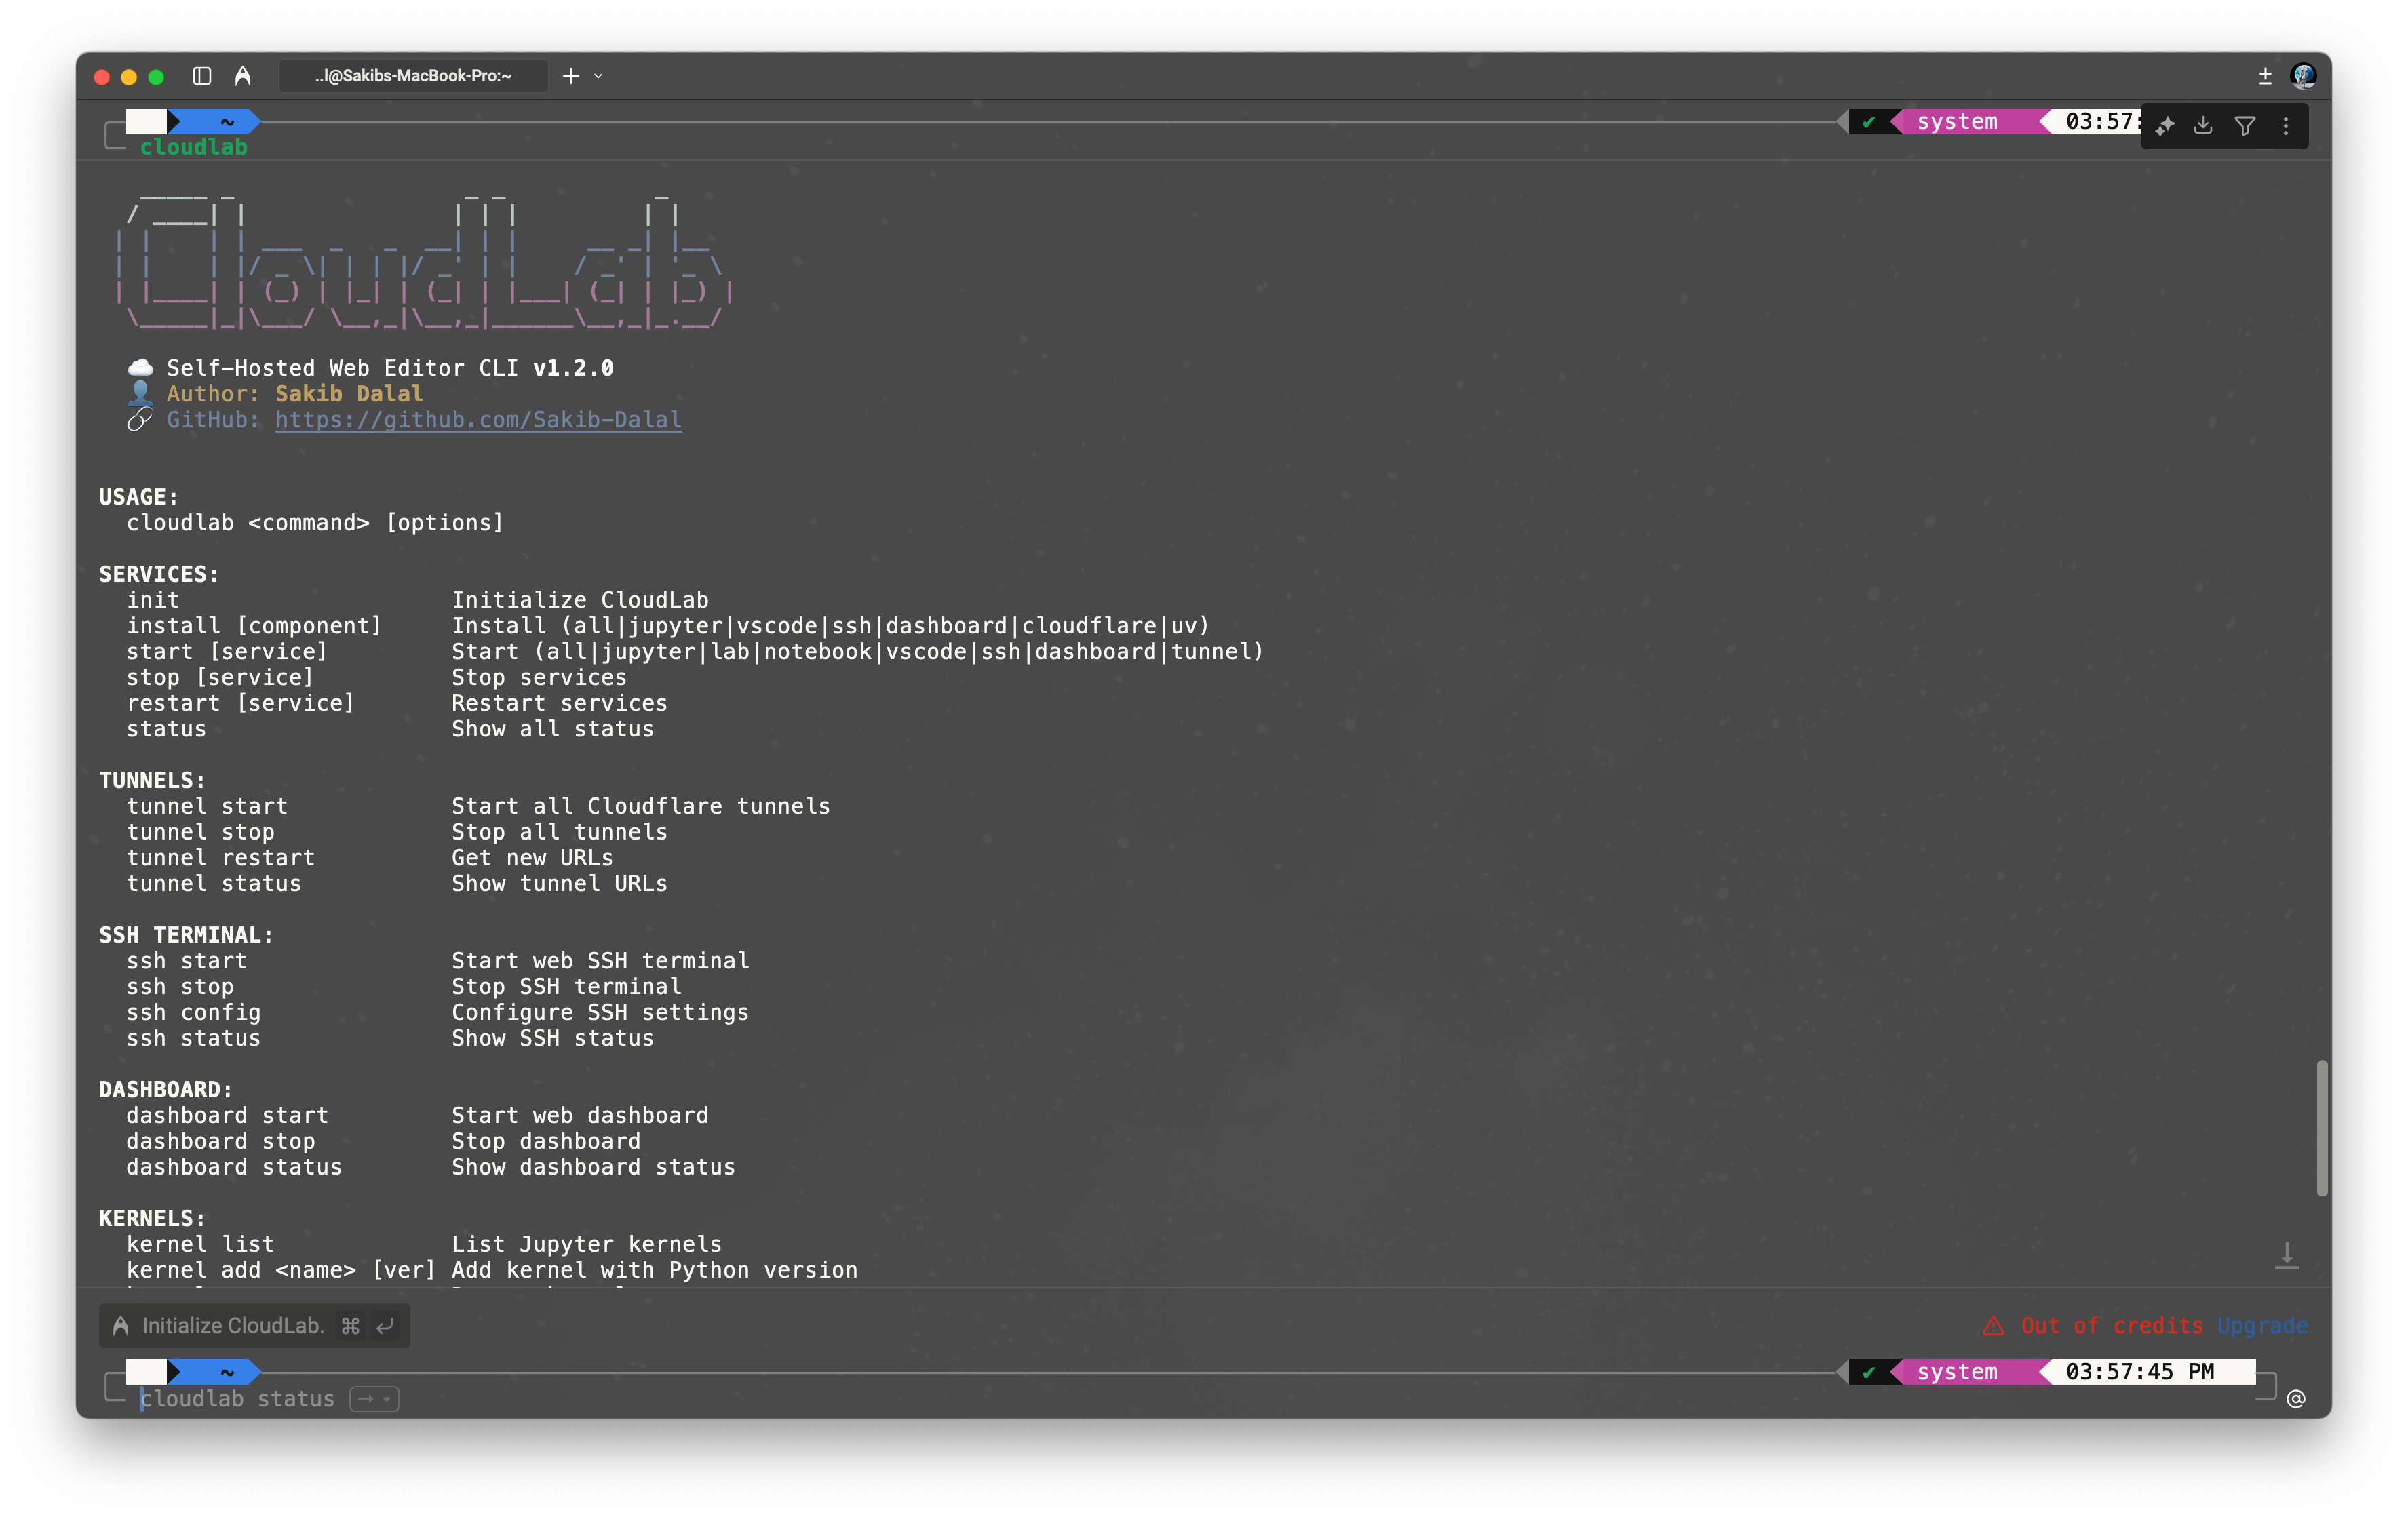
Complete list of all available commands
| Command | Description |
|---|---|
cloudlab start all | Start all services + tunnels |
cloudlab start jupyter | Start Jupyter Lab |
cloudlab start notebook | Start Jupyter Notebook |
cloudlab start vscode | Start VS Code Server |
cloudlab start ssh | Start SSH Terminal |
cloudlab start dashboard | Start Web Dashboard NEW |
cloudlab stop all | Stop all services |
cloudlab restart all | Restart all services |
cloudlab status | Show status and URLs |
cloudlab logs <service> | View service logs |
| Command | Description |
|---|---|
cloudlab tunnel start | Start all tunnels, get public URLs |
cloudlab tunnel stop | Stop all tunnels |
cloudlab tunnel restart | Get new URLs |
cloudlab tunnel status | Show current URLs |
| Command | Description |
|---|---|
cloudlab ssh start | Start SSH terminal |
cloudlab ssh stop | Stop SSH terminal |
cloudlab ssh config | Configure SSH settings |
cloudlab ssh status | Show SSH status |
| Command | Description |
|---|---|
cloudlab email setup | Configure email (Gmail, Outlook, etc.) |
cloudlab email test | Send test email |
cloudlab email send | Send all tunnel URLs via email |
| Command | Description |
|---|---|
cloudlab kernel list | List Jupyter kernels |
cloudlab kernel add <name> <version> | Add kernel with Python version |
cloudlab kernel remove <name> | Remove kernel |
| Command | Description |
|---|---|
cloudlab env list | List Python environments |
cloudlab env create <name> <version> | Create new environment |
cloudlab env remove <name> | Remove environment |
cloudlab env install <package> | Install package |
| Command | Description |
|---|---|
cloudlab config | Show current configuration |
cloudlab config set <key> <value> | Set configuration value |
cloudlab config reset | Reset to defaults |
Customize CloudLab to your needs
| Key | Description | Default |
|---|---|---|
jupyter_port | Jupyter port | 8888 |
vscode_port | VS Code port | 8080 |
ssh_port | SSH Terminal port | 7681 |
dashboard_port | Dashboard port NEW | 3000 |
jupyter_mode | lab or notebook | lab |
python_version | Python version | 3.11 |
working_directory | Project directory | ~ |
jupyter_password | Jupyter password | Auto-generated |
vscode_password | VS Code password | Auto-generated |
ssh_user | SSH username | Current user |
email_address | Notification email | - |
# Change Jupyter mode
cloudlab config set jupyter_mode notebook
# Change working directory
cloudlab config set working_directory /path/to/projects
# Change dashboard port
cloudlab config set dashboard_port 4000
# Change SSH port
cloudlab config set ssh_port 7777
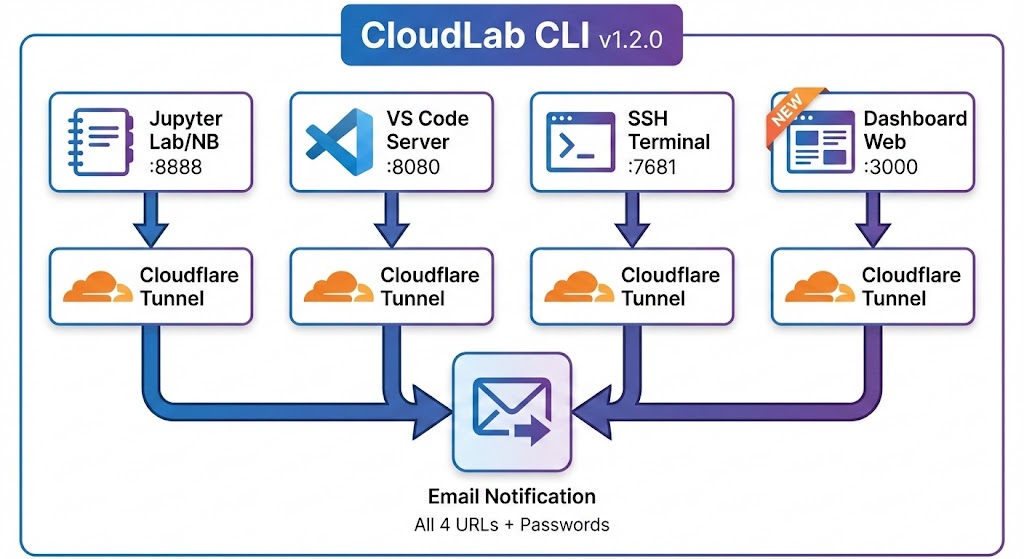
How CloudLab components work together
After starting tunnels, you'll get four public URLs:
Jupyter
:8888
VS Code
:8080
SSH
:7681
Dashboard
:3000
Configure email notifications to receive all tunnel URLs
cloudlab email setup
When you run cloudlab email send, you'll receive:
Where CloudLab stores its data
~/.cloudlab/
├── config.json          # Configuration
├── venv/                # Main Python environment
├── envs/                # Additional environments
│   └── <name>/          # Named environments
├── logs/
│   ├── jupyter.log
│   ├── vscode.log
│   ├── ssh.log
│   ├── dashboard.log    # Dashboard logs (NEW!)
│   └── tunnel_*.log
├── pids/
│   ├── jupyter.pid
│   ├── vscode.pid
│   ├── ssh.pid
│   ├── dashboard.pid    # Dashboard PID (NEW!)
│   └── tunnel_*.pid
├── vscode-data/         # VS Code user data
├── dashboard.html       # Web dashboard (NEW!)
└── server.py # Dashboard server (NEW!)Common issues and solutions
# Check logs
cloudlab logs jupyter
cloudlab logs vscode
cloudlab logs ssh

# Reinstall
cloudlab install jupyter
cloudlab install vscode
cloudlab install ssh# Restart tunnels
cloudlab tunnel restart
# Check tunnel logs
cloudlab logs tunnel_jupyter
cloudlab logs tunnel_vscode
cloudlab logs tunnel_ssh
cloudlab logs tunnel_dashboard# Test email config
cloudlab email test
# Re-setup email
cloudlab email setupcloudlab stop all
cloudlab config reset
cloudlab initCloudLab uses Cloudflare Quick Tunnels (TryCloudflare)
random-words.trycloudflare.com# To get new URLs:
cloudlab tunnel restart
cloudlab email send  # Send new URLs to your email